Running Jupyterlab¶
JupyterLab is an interactive development environment that combines code execution, documentation, and collaboration features to facilitate data analysis, prototyping, and software development workflows.
In this tutorial we're going to: - Create a security group with traffic rules - Create a new instance - Install NVIDIA drivers - Install miniconda3 - Install Jupyterlab
Creating a new security group for Jupyterlab.¶
We will create a new security group with traffic rules to allow traffic to our Jupyterlab instance.
Go to the security groups view of the network section Security groups.
- Press Create Security Group
- Name the security group "jupyter-hub" and add a fitting description
- Press Create Security Group
- Locate your newly created security group in the overview and press "Manage Rules".
- Press Add rule
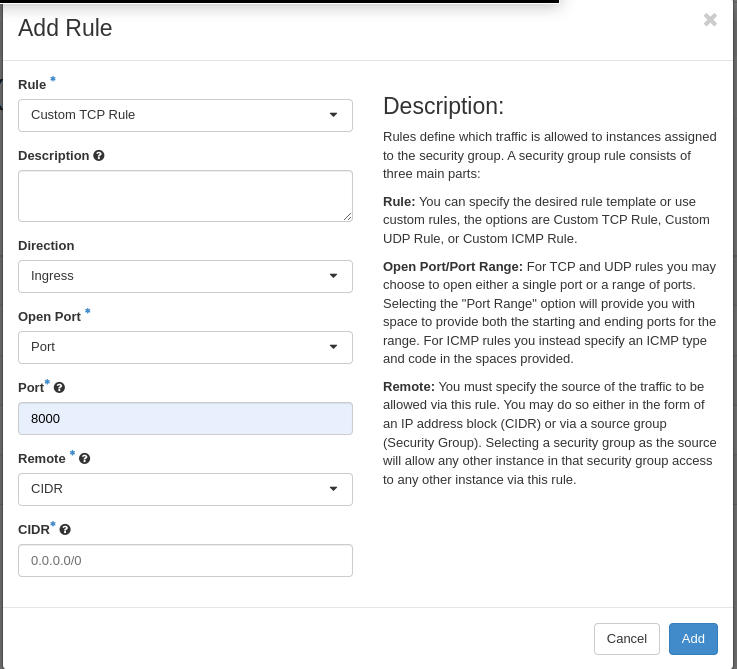
- Fill in the form according to the picture and click add.
Creating the instance¶
To create the new instance, go to the instance view of the dashboard.
- Press Launch instance
- In the Source tab select "Image" and the boot source
- Select the
Ubuntu-22.04image - Set the volume size to a minimum of 40GB and increase it according to the demands of your installation.
- As the flavor select any gpu flavor, starting with
eg1. - Select a network, to give the instance a public IP address use the
externalnetwork - Select a key pair, this key pair will be used to
SSHinto the machine - Add the jupyter-hub security group
- Press "Launch Instance"
- Wait until instance reaches running status.
Connect to your instance¶
Open your terminal and enter the following:
Once you've connected to your instance you can proceed to update it:
sudo apt update &&
sudo apt -y upgrade &&
sudo apt -y dist-upgrade &&
sudo apt -y autoremove &&
sudo apt -y autoclean
Install NVIDIA drivers¶
You can find the latest version of NVIDIA drivers here: https://packages.ubuntu.com/search?suite=default§ion=all&arch=any&keywords=nvidia-driver-&searchon=names
Install the latest driver
After successfully installing the NVIDIA driver reboot your instance
Connect to your instance again after reboot.
Check that the drivers are correctly installed and active:
Install Miniconda3¶
curl -O https://repo.anaconda.com/miniconda/Miniconda3-latest-Linux-x86_64.sh
sh Miniconda3-latest-Linux-x86_64.sh
Press enter to start the installation off Miniconda. Read the terms and accept them by typing "yes"
After installation reload your shell
Create a new conda environment and activate.
Install conda packages:
conda install pytorch torchvision torchaudio pytorch-cuda=11.7 -c pytorch -c nvidia
conda install -c conda-forge jupyterlab
You can now start your JupyterHub server by running:
In the console logs you can find the startup url of Jupyterlab. This also contains the authorisation token.